

Showing posts with label Black Templar. Show all posts
Showing posts with label Black Templar. Show all posts
Saturday, 1 August 2020

Sunday, 24 June 2018
Black Templar Razorbacks

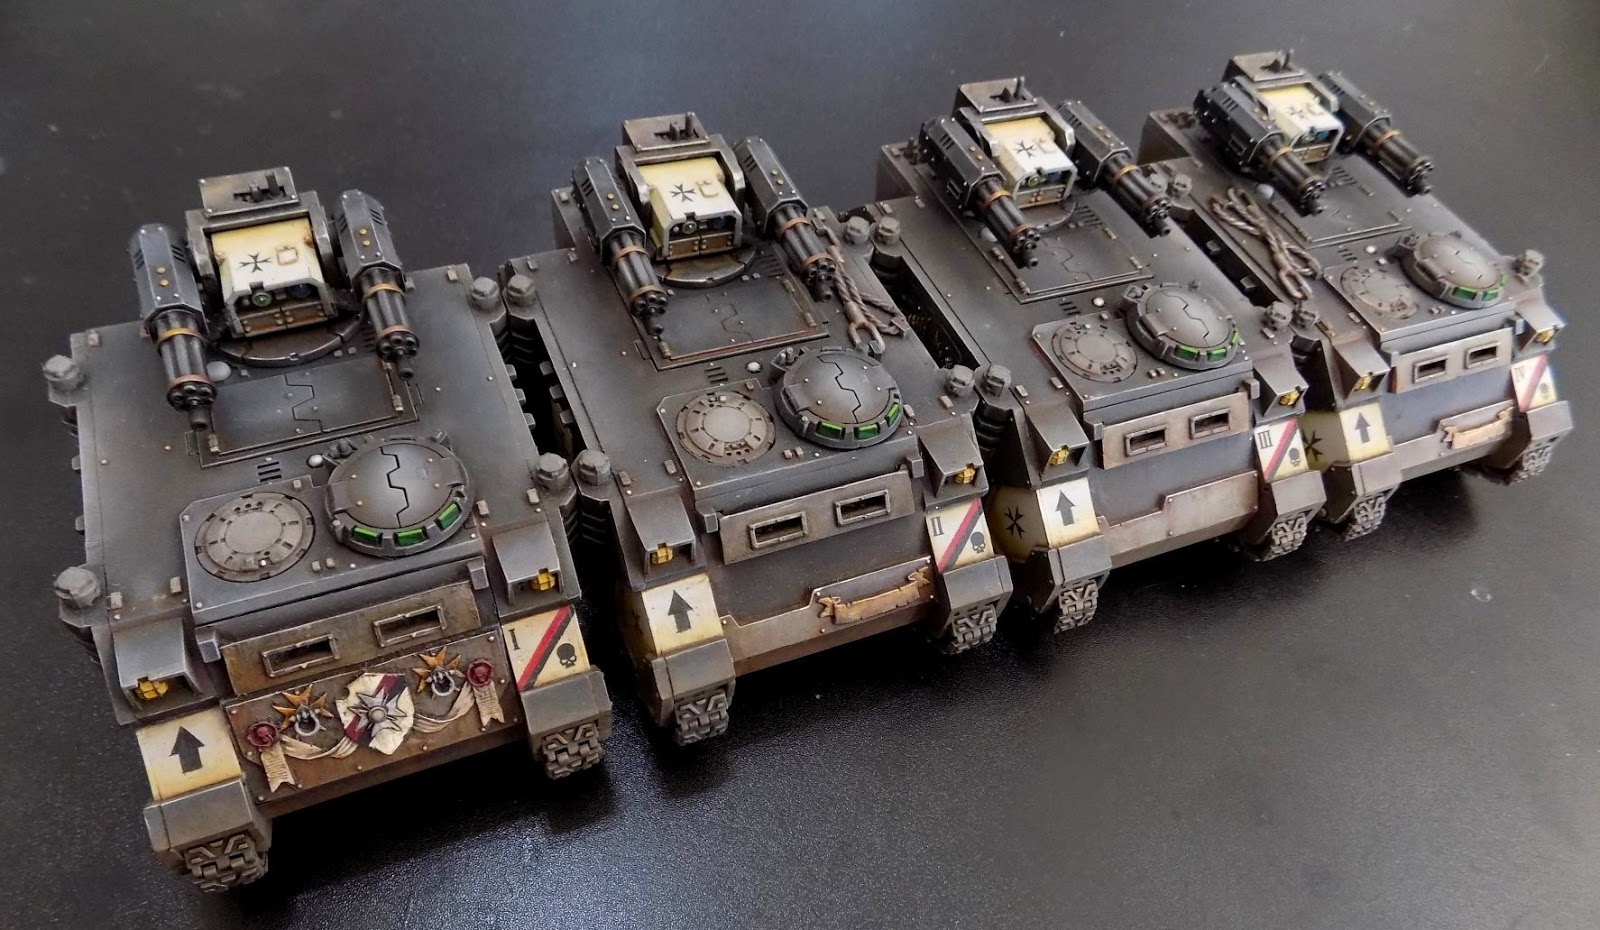
Finished the Razorbacks for my Black Templars. These were all 2nd hand old reclaimed rhino models, stripped of layers of paint (they were globs.. I stripped them from Dark angel green through blue to red..) had to do a lot of filling, replace door panels/hatches, add FW turrets.. it was a long project that started and stopped but now they're done and ready to crusade in the Emperors name.
Friday, 25 May 2018


Saturday, 10 June 2017

Wednesday, 7 June 2017
Black Templar Inceptor Squad

Templar Primaris Inceptor Squad Heinkel,
ready to rain down righteous fury on heretics.
ready to rain down righteous fury on heretics.
Sunday, 4 June 2017
Black Templar Intercessor Squad

Templar Primaris Intercessor Squad Heiden, ready for the crusade.
Lovely models to assemble and paint, more to come soon.
Lovely models to assemble and paint, more to come soon.
White Recipe:
Prime areas white. Paint white. Glaze lightly in all recesses with greys, then overlay with thin light sepia glazes from halfway down in around seven or eight layers, stronger to the bottom of the pads. Varnish seal work. Line out with mixed black/dark grey oil paint thinned with white spirit. You can also correct any sloppy glaze errors by modulating with sepia oil paints at the final stage if required, or add damage marks/grime as desired.
Black Recipe:
Spray primer black all over. Spray primer white *lightly* from above. With a light grey, VERY finely edge highlight most extreme angles, here and there as desired, very optional placement. Bring it all down again with black washes. Seal model with varnish. When completely dry and solid, work any areas that are still too light down into shadow using black oil paint, thinned with white spirits. This will also help line out all recesses even darker too. At this stage you can also add in colours to your remaining highlights above and shadows below with subtle purples, blues, umbers, whatever you feel like to modulate the look here and there. Pop edges as needed with light greys again, but again, optional and very subtle or it will botch the finish.
Most importantly: have fun experimenting with your own style and remember, the crusade is eternal.
Thursday, 1 June 2017
Spartan and Crusaders


Monday, 29 August 2016
Black Templars
Imperator Vult

More infantry added and a nice photo of some of the army now.
In the front row are (L-R)
Lord Marshal Mercadius,
Master of Sanctity Ravenstein,
Brother Eisenfalken the Emperors Champion

More infantry added and a nice photo of some of the army now.
In the front row are (L-R)
Lord Marshal Mercadius,
Master of Sanctity Ravenstein,
Brother Eisenfalken the Emperors Champion
Thursday, 18 February 2016
Got 99 Problems but a witch ain't one
Contending with 30 tactical marines from the Betrayal at Calth boxest from GW. I swapped all the heads for MK3 Iron Armour Helmets from the fantastic Forgeworld Horus Heresy range.
Just the Sergeant weapons to do, then the basing and purity seals and we are done.
Just the Sergeant weapons to do, then the basing and purity seals and we are done.
Crusade recruitment a success!

Sunday, 5 May 2013
Chaplain Dreadnought WIP 3
Another update on how the lanky rust bucket is progressing in between other projects I'm knee deep in.
Decided to redo the left claw - the blood effect needs redoing, (I have some new tamiya clear red in the mail from ebay)..
Made a couple of little magnetized options for under the sarcophagus; a targetter, another couple of guns including a flamer on a servo arm..kinda looks cool giving a dread extra lil arms for things). IDK just fun stuff to make it look unique and different. Lots more rusty effects added to the left arm now and some started on the right arm. I have some forgeworld aircraft cannons arriving soon (this week hopefully). I'm looking forward to riggin up a right arm for them to be mounted on.


Decided to redo the left claw - the blood effect needs redoing, (I have some new tamiya clear red in the mail from ebay)..
Made a couple of little magnetized options for under the sarcophagus; a targetter, another couple of guns including a flamer on a servo arm..kinda looks cool giving a dread extra lil arms for things). IDK just fun stuff to make it look unique and different. Lots more rusty effects added to the left arm now and some started on the right arm. I have some forgeworld aircraft cannons arriving soon (this week hopefully). I'm looking forward to riggin up a right arm for them to be mounted on.


cheers =]
Friday, 3 May 2013
Chaplain Dreadnought WIP 2
A quick update of how he is progressing. A lot of the lower limb rust and mechanical weathering is coming along, some macabre blood/ichor on the power claw and other magnetized optional bits starting to assemble. I had a chat and a coffee with a friend earlier and he approved of the colour choices so far. He's got a strong academic/artistic understanding of colour theory so it was good to get some valuable feedback on certain things, suggestions I could try out in the later stages etc.


Back to the chapter crypt he goes until tomorrow.
Thursday, 2 May 2013
Rusty stuff.
Here's a few WIP shots of the rust and weathering work as it progresses.
It's always a fun process and as it develops and the effects begin to happen across the surface of the model. I find it very relaxing and it does offer creative opportunities; some violet reflections here and there, spots and patches of blue hues and greens that contrast visually with the oranges and warmer tones of the rust colours.

More stuff soon!
It's always a fun process and as it develops and the effects begin to happen across the surface of the model. I find it very relaxing and it does offer creative opportunities; some violet reflections here and there, spots and patches of blue hues and greens that contrast visually with the oranges and warmer tones of the rust colours.

More stuff soon!
Chaplain Dreadnought WIP
Time to add something else to the Crusade.
This chap is a great sculpt to paint. It's the chaplain dreadnought I purchased many moons ago and I finally finished off all the conversions I wanted. He has longer legs so he looks like he can walk faster than a snail now, longer melta barrels, finer banded hosing, torso/waist relocation forward under the ribcage as it should be! - and a plethora of filling jobs required, plus added iconography and magnetising the torso and limbs.
He stands about 11-12mm higher than a originally/regular dread and hopefully will look more in scale with the FW Contemptor Talon 3-pack I plan on one day owning.
The original iron halo in this kit was used on the gunship, it fitted on top of the air intake scoop perfectly --but only because I have a much nicer once that suits this model.
I will add that chunk of brutal blades above the carapace towards the final painting stages.
He also has a banner/relic blade to go on top behind the halo.
So here's a WIP shot of the fella.

More stuff soon!
This chap is a great sculpt to paint. It's the chaplain dreadnought I purchased many moons ago and I finally finished off all the conversions I wanted. He has longer legs so he looks like he can walk faster than a snail now, longer melta barrels, finer banded hosing, torso/waist relocation forward under the ribcage as it should be! - and a plethora of filling jobs required, plus added iconography and magnetising the torso and limbs.
He stands about 11-12mm higher than a originally/regular dread and hopefully will look more in scale with the FW Contemptor Talon 3-pack I plan on one day owning.
The original iron halo in this kit was used on the gunship, it fitted on top of the air intake scoop perfectly --but only because I have a much nicer once that suits this model.
I will add that chunk of brutal blades above the carapace towards the final painting stages.
He also has a banner/relic blade to go on top behind the halo.
So here's a WIP shot of the fella.

More stuff soon!
Sunday, 16 December 2012
CRUSADERS!
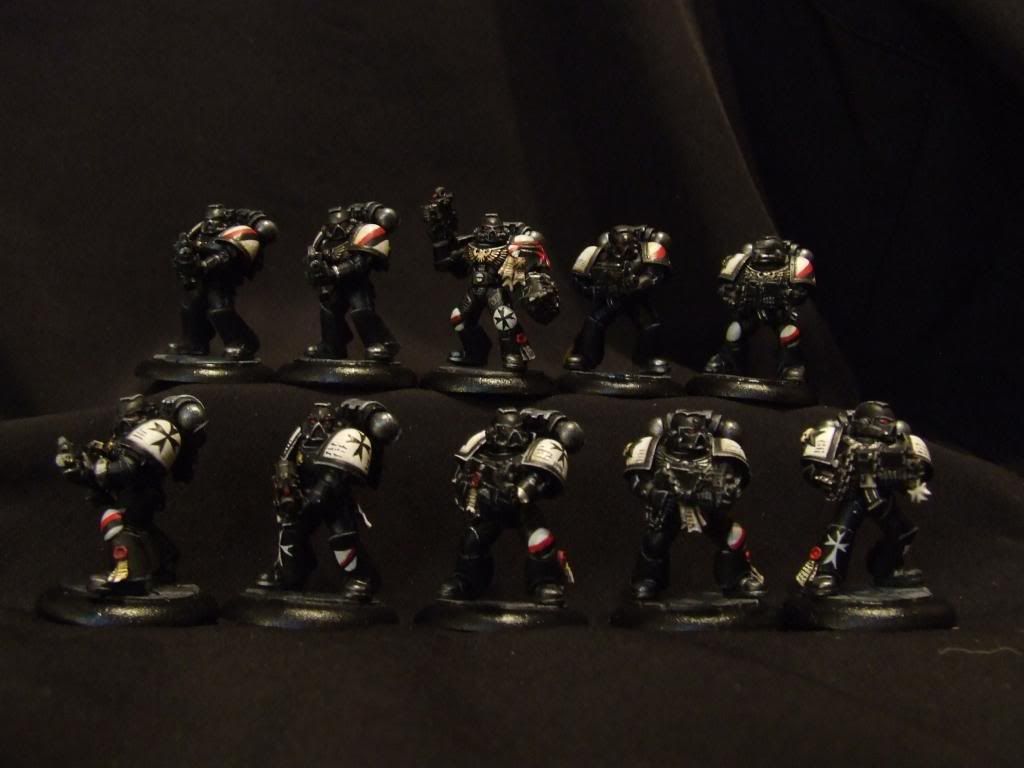
CRUSADERS!
Initiates of the 2nd Mercadian Crusade
Templar Crusader Squad, Raserei and Grimm if Split into two squads.
This is the drop pod - Any ideas for a name for it would be interesting... :D
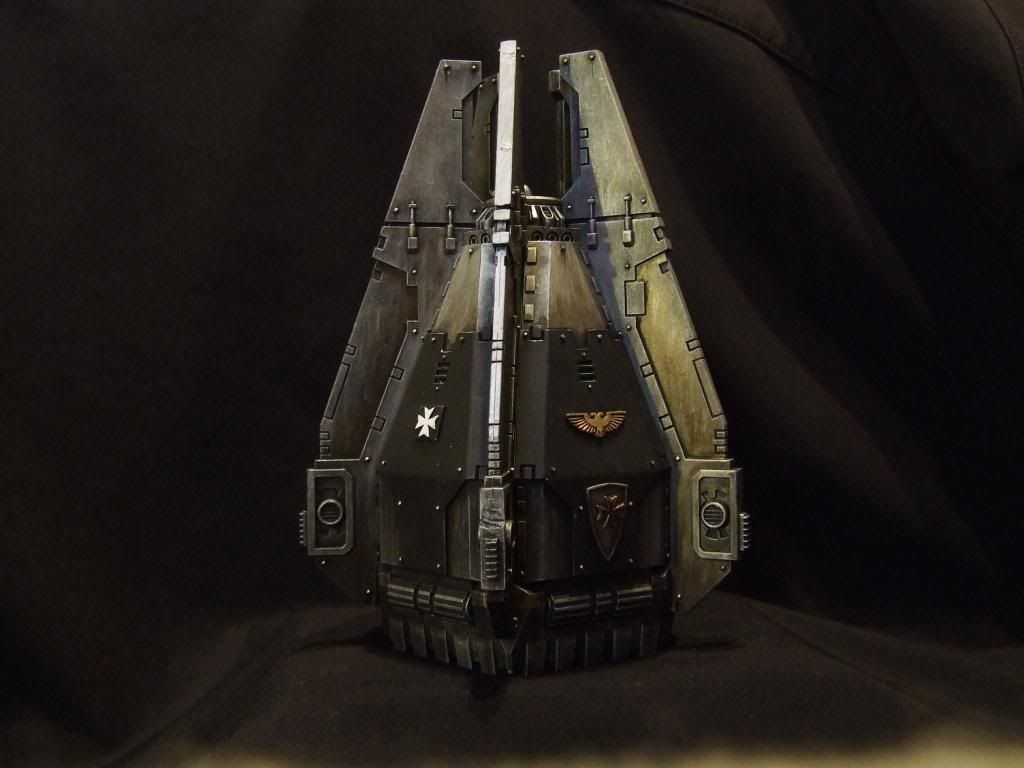
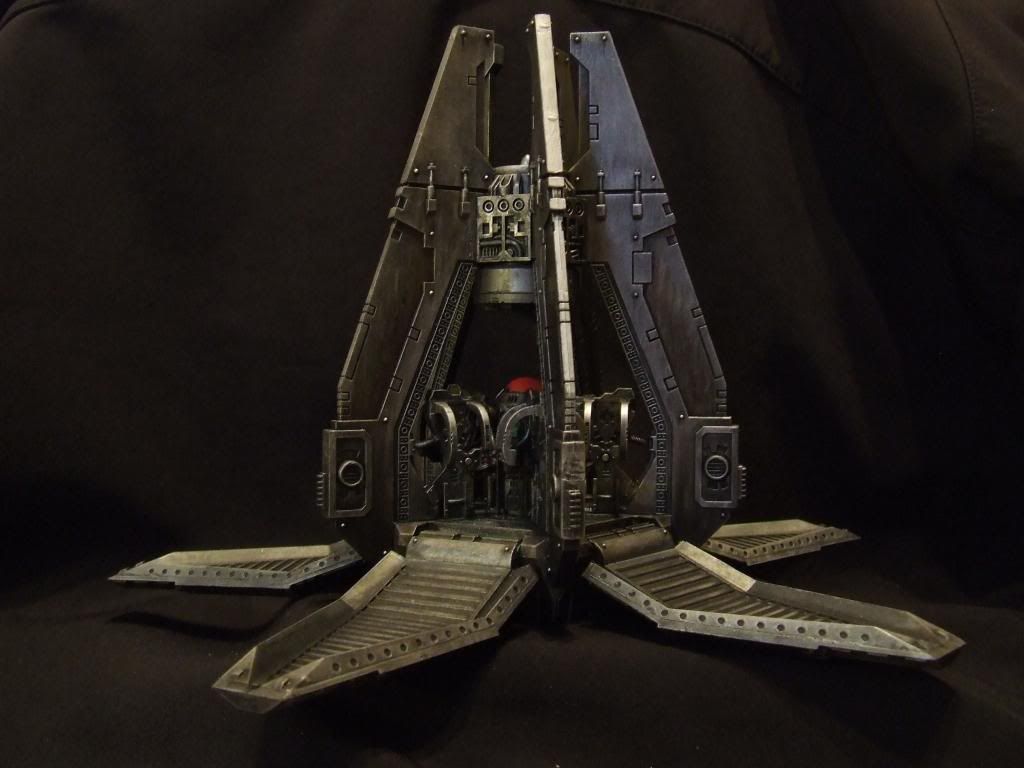
I want at least 2 more in time as the crusade continues.
I need transports for all these battle brothers too..

IMPERATOR VULT!
I need transports for all these battle brothers too..
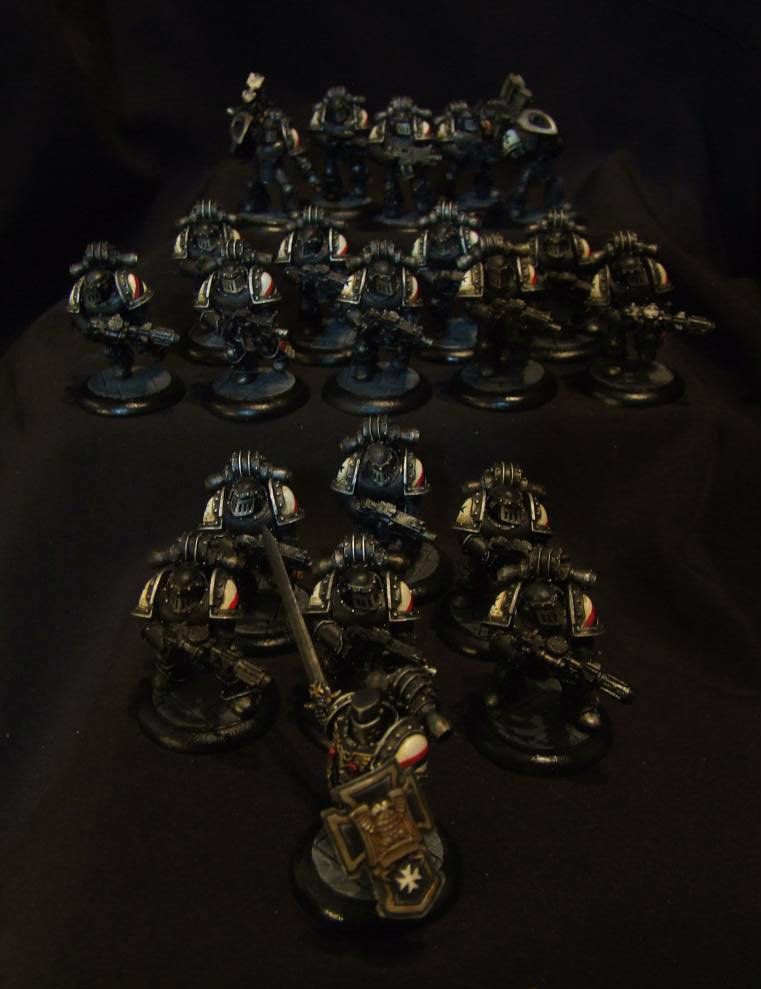
IMPERATOR VULT!
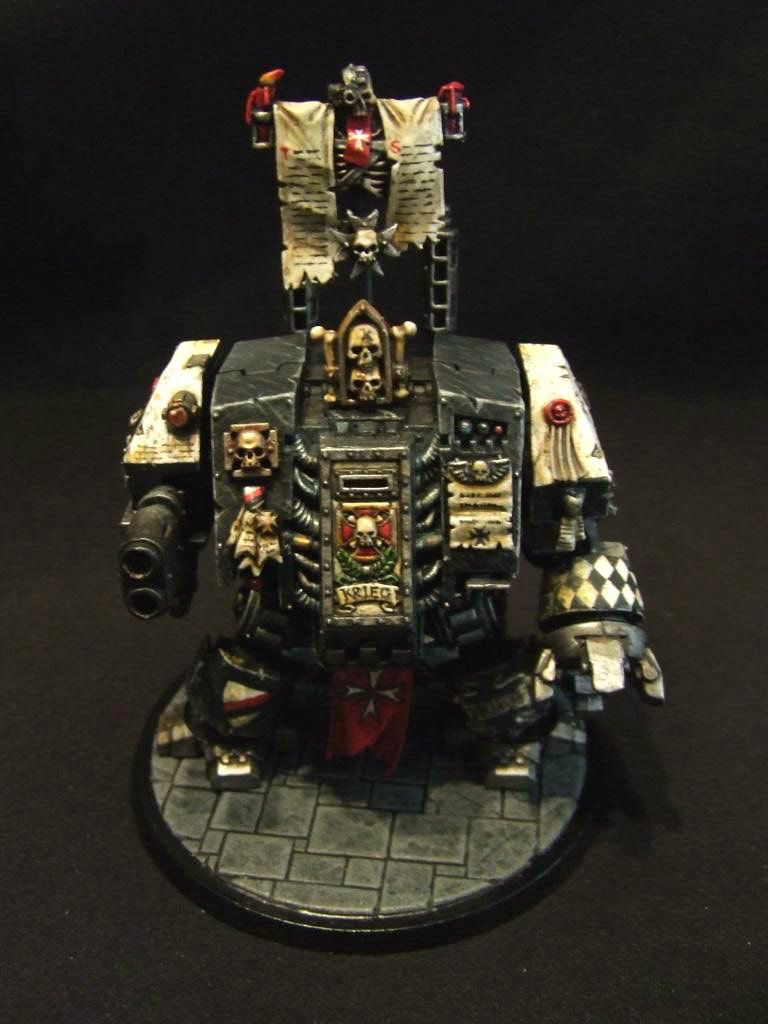
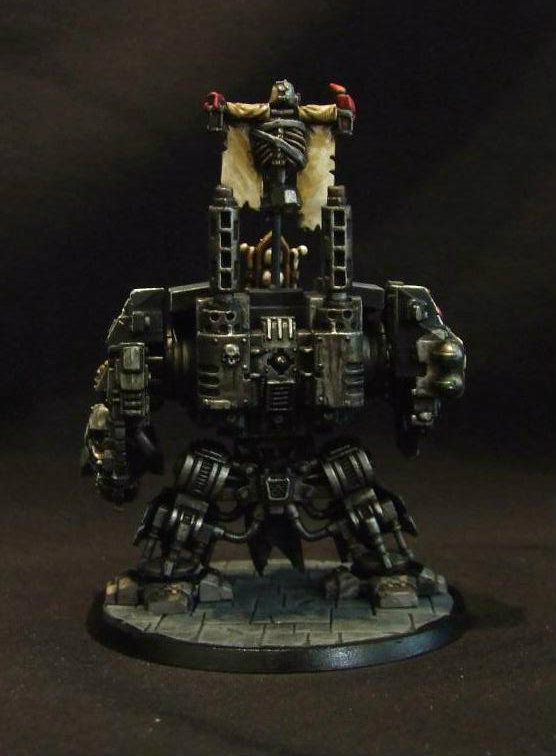
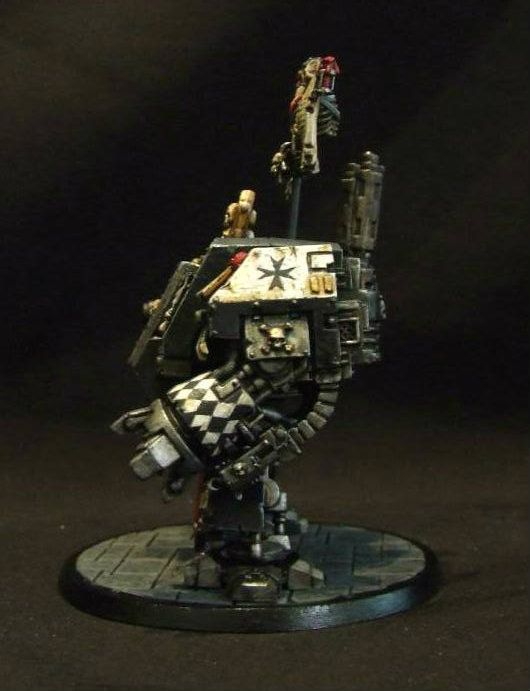
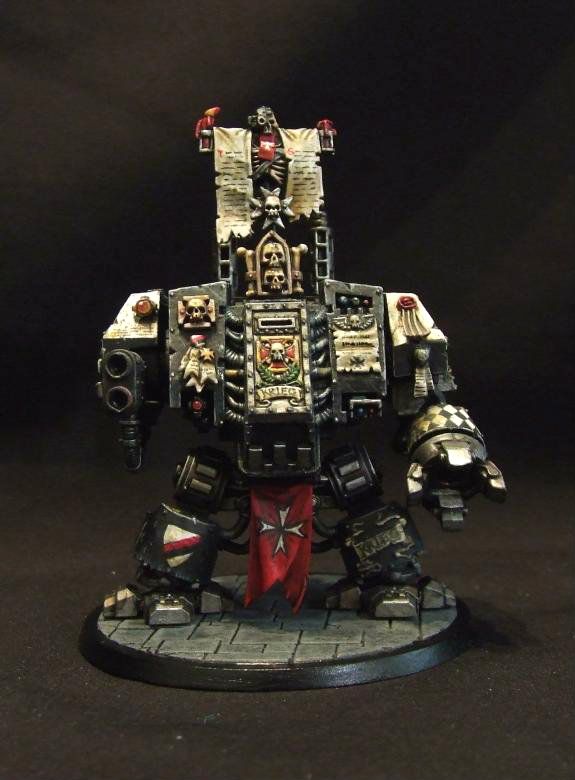
Venerable Brother Krieg
Another part of the 2nd Mercadian Crusade update
Entombed inside his steel sarcophagus for two centuries, sustained by life support systems and hatred for the enemy, Venerable Dreadnought Brother Krieg strides into combat, wrath personified.
His voice chanting constantly in bass tones, hymns and psalms of devotion to the God Emperor of Mankind.
Holy words echo around him as he advances into the heart of any fight he can find.
One of his candles is burning bright like his anger.
The other one, like his compassion, died long ago.
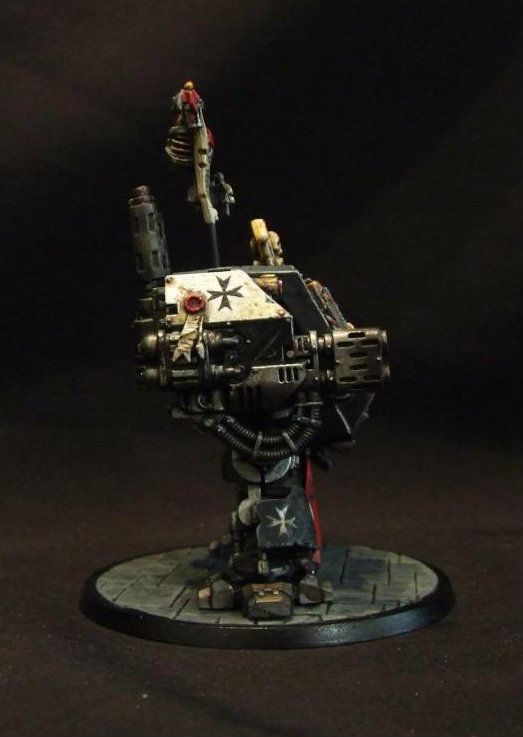
Dodgy photos of my old venerable dread. I'm still not very good at photography! Learning curves not too sharp..anyhow!
It's not an actual venerable kit, just a bog standard AOBR dread with a few tweaks.
He's been around a while, stomped a few xenos and heretics in his time and gets bits added and subtracted through battle damage and other disasters.
I always planned on making a few different arms for him so he has a small arsenal of weaponry to play with one day.
Any suggestions would be appreciated, what's your favourite arm combo for a dreadnought?

I have the FW chappy dread in basic stages of assembly. He'll be joining Krieg in the Crusade in future.
Right now though, the biker knights need more work..
Friday, 14 December 2012
Paint it Black..Templars...
Imperator Vult!
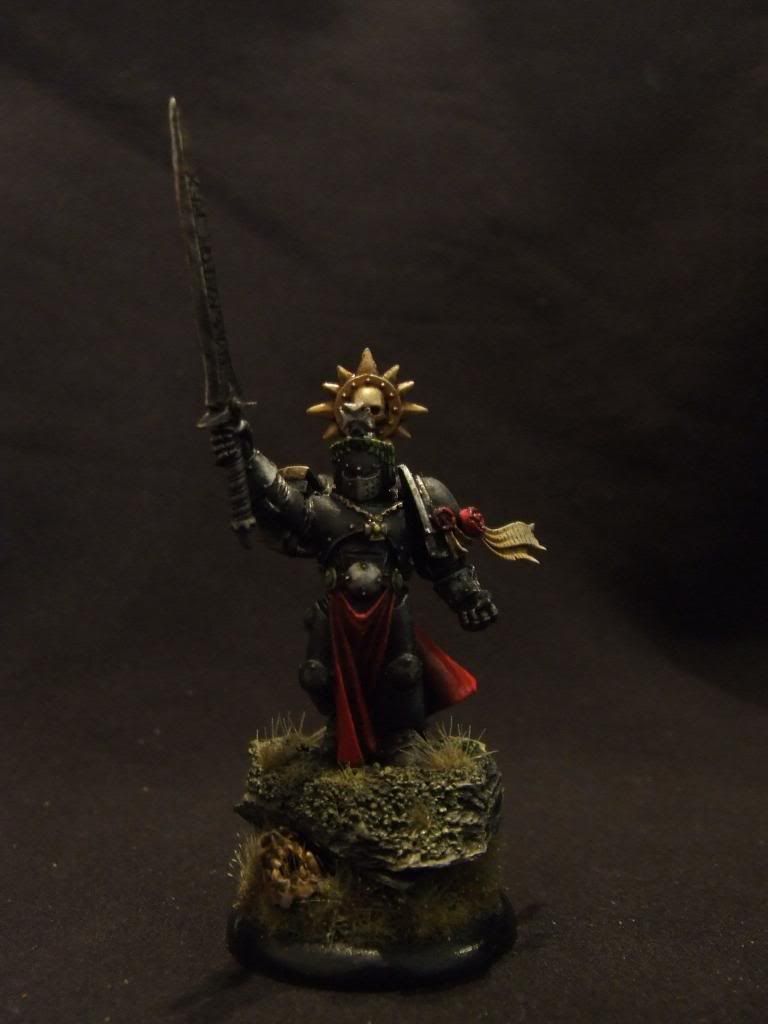
This is part of what I have researched online and experimented with over the years. Here is a list of stuff that may or may not be useful to Templar players in particular. We have a really cool but annoyingly difficult to get right colour scheme. It's black but it needs detail. Argh. We need our lads to look grim and double-ard but without becoming blobs of black with white. So you get the kit, you make the marines..what next?
After prepping the miniatures as much as you want to, get them ready for the painting.
Get all ten of them ready in a go or squad etc. Don't mess about with one at a time. This is a battle force not golden demon. This is a crusade and it needs to get seriously underway from the start.
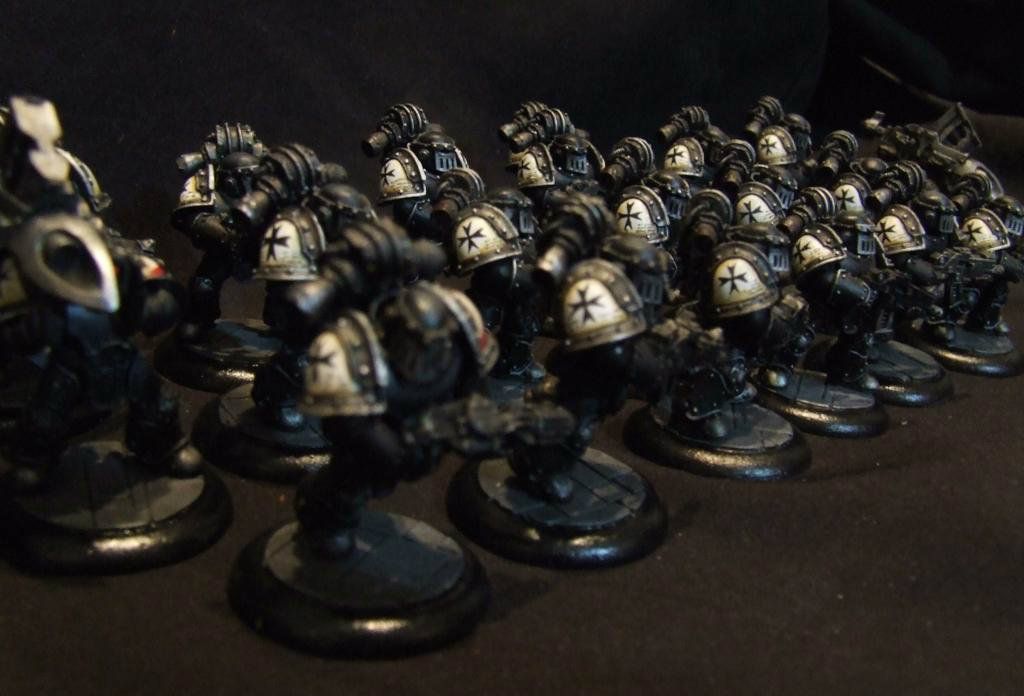
Mount the miniatures on a cork stand or a painting socket. Go to the hardware store or wilkos or w/e and buy a big pack of wine corks. Pin your figure in the soles of his feet with paper clip/wire and impale him on his cork stand. you can weight the cork stand/socket underneath with coins glued together if you are clumsy like moi. This whole process means your miniatures never get touched by anything other than a brush during the painting process. Very important. Does not matter they are going to be mostly black anyway.
They must be treated reverently by us lowly paint servitors as the holy warriors of mankind that they are.
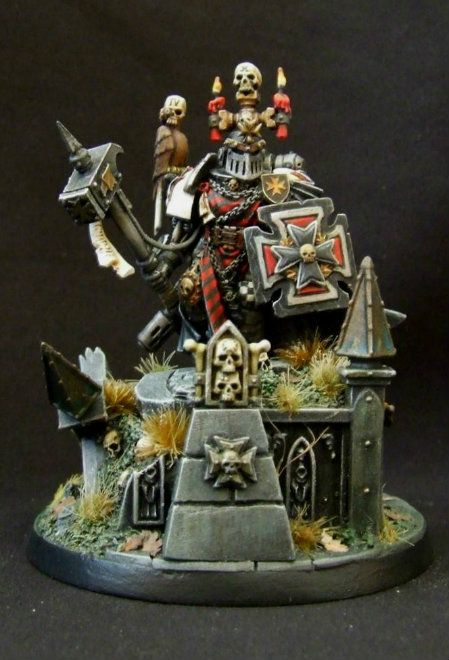
Zenithal highlighting at the undercoat stage is a biggggg part of the process.
A brief explanation:
Don't start painting your black undercoated miniature without hitting it briefly afterwards with white spray from a single direction mimicking a light source above/angle to the miniature. Don't go crazy. Quick zip from steady location, one direction and slowly rotate the mini in one direction a little. You are aiming to get the 'light source' white spray gently across one side of the mini from a 45 degree angle downwards.
Subtle is the result you want, just hint of light from one source. This will instantly help define your miniature. Before you even start painting him you will have an optical reference of where the 3D effect of light would be on all black areas.
Next step can be slow so let minis dry out from spray for a while. No rush, make a drink or snack or burn a heretic.
Shade down to black now in shadows where the light spray hit with careful brush tip washes.
It is FAR easier than trying to get a smooth highlight by lightening the figure up with progressive greys etc.
This way you're also not caking paint on the miniature to define it, you're applying thin thin thin layers of watered paint to do the same job..
Use different subtle inks and glazes of colour on metallic areas to try and break up the blandness of monotonous silver-against-black sections of the miniature.
Great thing about doing a squad at once is that once you start shading down and getting damp miniatures in a conveyor belt of 'do this section, swap, repeat, contue etc. if you get a rhythm going it vastly helps increase speeds. you may end up at times waiting for all 10 to dry at once.
No problem... again, take a break or check ebay for that bit you really need for that conversion or just persecute a witch perhaps.
[b]Never[/b] use pure silver like platinum or mithril or runefang or w/e across a surface without washing it down carefully afterwards.
These are templars and they spend almost every moment of their lives deep in conflict. They don't need to look like parade ground. The battlefront is where they march.
So, Only ever use pure silver for edge highlighting and popping rivets. Again, good practice for brush control.
The whites a bit trickier. You can either leave the shoulder pads off the mini when u prep/undercoat and spray them matt white then line them out afterwards or.... or do it the long way and paint your undercoated pads up from the black undercoat (with its spray highlight, of course).
The long way will almost always look better however for some reason. It just looks more 'solid'.
It must not be chunky with paint as much as you can help it, I made this mistake a few times before. Hence why thinning the white is so important.
Like milk. Go look at milk in your refrigerator. Contemplate the milk. Exactly Like that.
Now go make the white paint like milk with water or flow improver or whatever you personally find easiest to work with.
As it is runny as hell you must be careful how you load your brush.
Don't ever let it drip or run from the brush tip when u apply it.
Don't let it pool on the pads. It goes on smooth. Good brush is important here. Again, whatever brand works for you is best.
You end up building up a thin grey splotchy pad to white even coats in many stages depending on room temperature, use of hair dryer etc, motivation, lack of annoyance from others etc or just plain luck to get a matt white pad. It must be matt. NO exceptions. If it is not matt white, it's not worthy or being on the Templar.
Lotsss of thin coats.
You'll get the hang of it very quickly.
ALWAYS Let each coat dry fully between application.
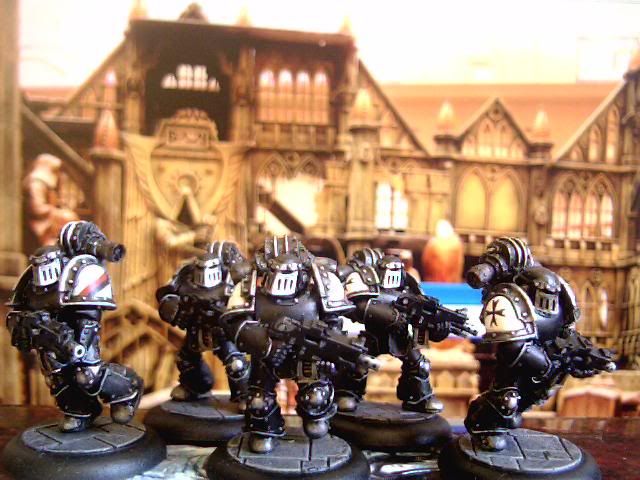
Paint the icons on shoulder pads now again using thinned black and sparsely loaded brush tip. Paint the icon by making a tiny vertical and equal cross + then rotate the shoulder 45 degrees then paint one side of a v in each direction from the cross tips, keep the brush fixed in the same direction for every line then reverse it and do the same. So you now have a cross + with 4 small v at each point, in each direction fanning outwards. Fill in the V points from the tip in a straight line to the center cross. Again you need a good brush you feel confident with for detailing.
Fix the white painted pad and icon you painted [i]together[/i] with a quick thin varnish (ideally airbrush for thinness).
Let it dry thoroughly.
Take a break.
Execute a xeno or two.
Now, glaze each pad back down with very thinned layers of sepias and camoshade hues to cut in the edges against armour. As you apply each wash, dab the surface clean in one direction [b]gently[/b], downwards.
This takes the inky glazes off the point you want to leave whitest. It will look extra 3D this way I promise.
After you are happy with the overall look and tone of the miniature, carefully add sparing edge highlights to the most extreme edges - a mithril/platinum to the metallics, and lighten up the black edges here and there with a lighter mix colour like rakarth or dheneb but sparingly. You could add even thinner whiter points to certain edges if you feel confident. As with all edge highlighting it is about brush control using the side of the brush tip. Be prudent but get those edge light hits in the same places. light does not hit something from all directions strongly so look at how the figure is standing, where your zenith is, and improve the light edges that respond to that most.
Depending on how fast you do all these stages and the care you took applying it to the miniature will dictate either how crisp it looks or how grubby and crisp it looks. Either way, it's crisp and has definition even though it is a dark colour scheme.
Motivation is important and you need time to devote to a project obviously. It's always a stumbler for many of us because life gets in the way of hobby.
That's kind of all I can think of for the moment that's really been useful to me doing my Templars.
These basic techniques are easy to do over time with patience, anyone can do it I believe with practice.
Developing brush accuracy is important and your creativity and how far you want to push it..
You learn to let surface tensions and capillary action work for you and it's a lot easier, less frustrating and enjoyable too.
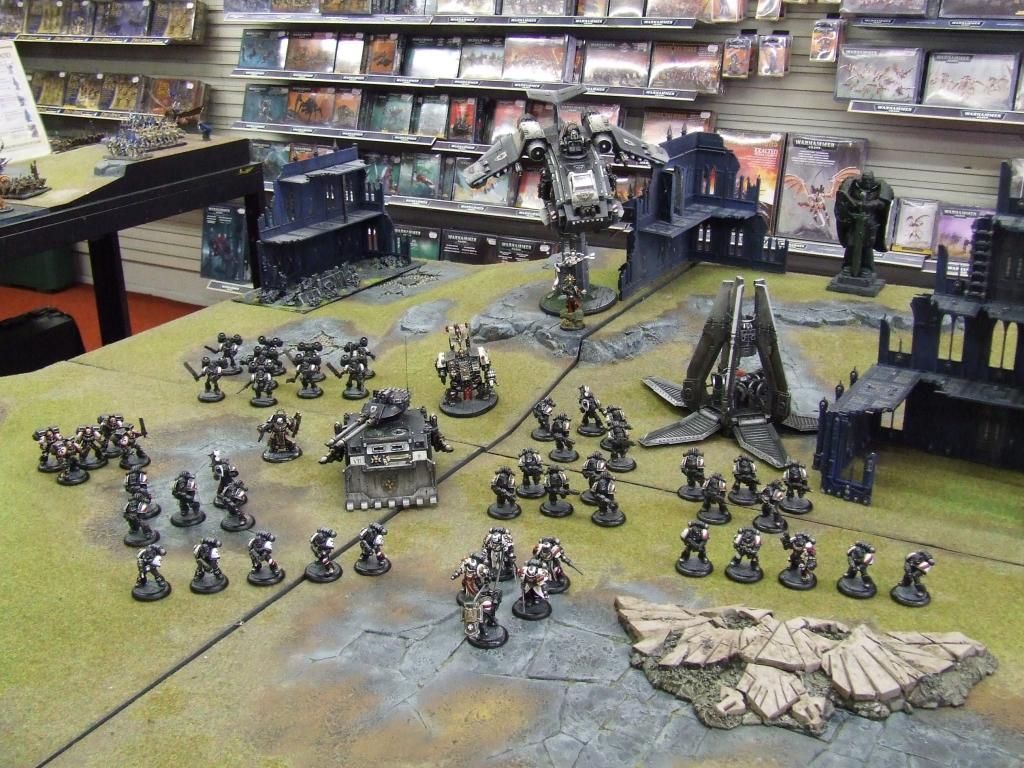
A few other general tips finally: Practice a lot. Not just on miniatures either. Try painting anything on anything as long as you are using a brush because its constantly calibrating your mind and hand and brush together and you WILL get better.
Consider how you hold your brush. Do you use your 'spare' fingers to stabilise both hands and miniature together while painting. How you sit when you are working. Are you as relaxed as you could be. Is your light source sufficient for working under. Take breaks often if you need them. It's a lot of concentrating and it needs to be fun not a chore.
Enjoy your hobby!
Thursday, 13 December 2012
Gunship: Angel Of Antioch
Finally got some photos done of the detailing
and weathering on the GW Stormraven kit.
I have renamed this pattern as an 'Eisen-Falken' Gunship.
Seemed far more Black Templar.
She was blessed by Master of Sanctity Ravenstein as
'The Angel of Antioch'
I tried lots of various weathering techniques,
oil streaks, grubby engines and battle grime.
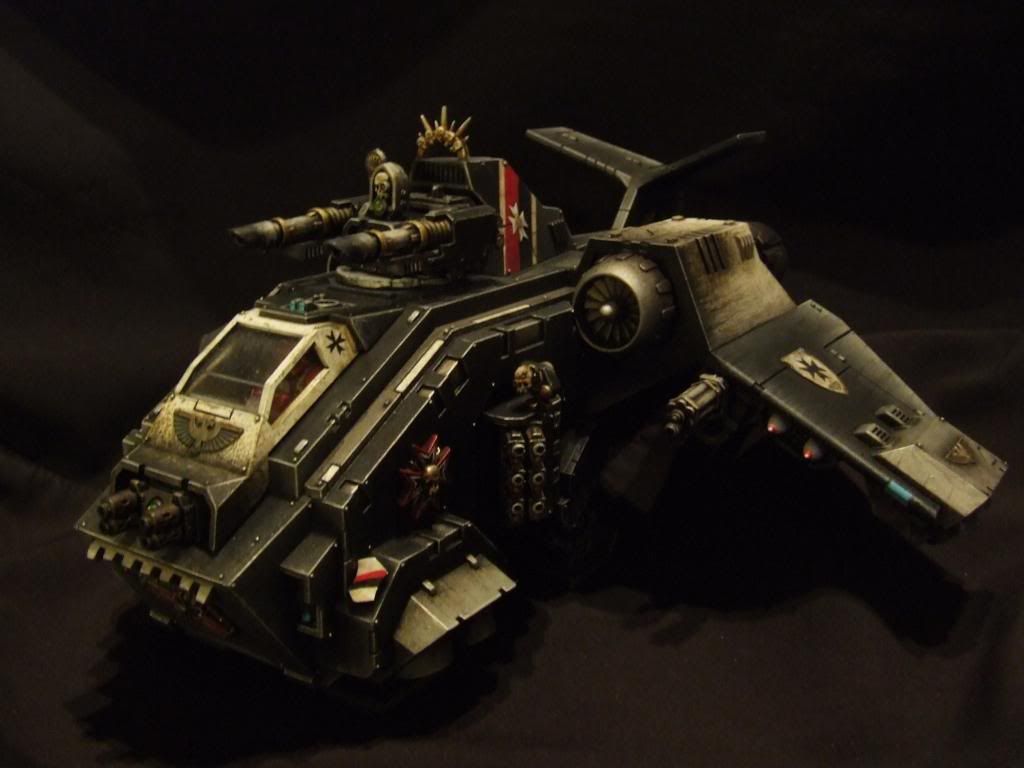
Forgeworld razorback turret and resin BT rhino door
fitted without too much bother. They fit quite snugly.
Brass etch BT icons and carving up BT landraider doors gave
me lots of options for embellishing the hull and fuselage.
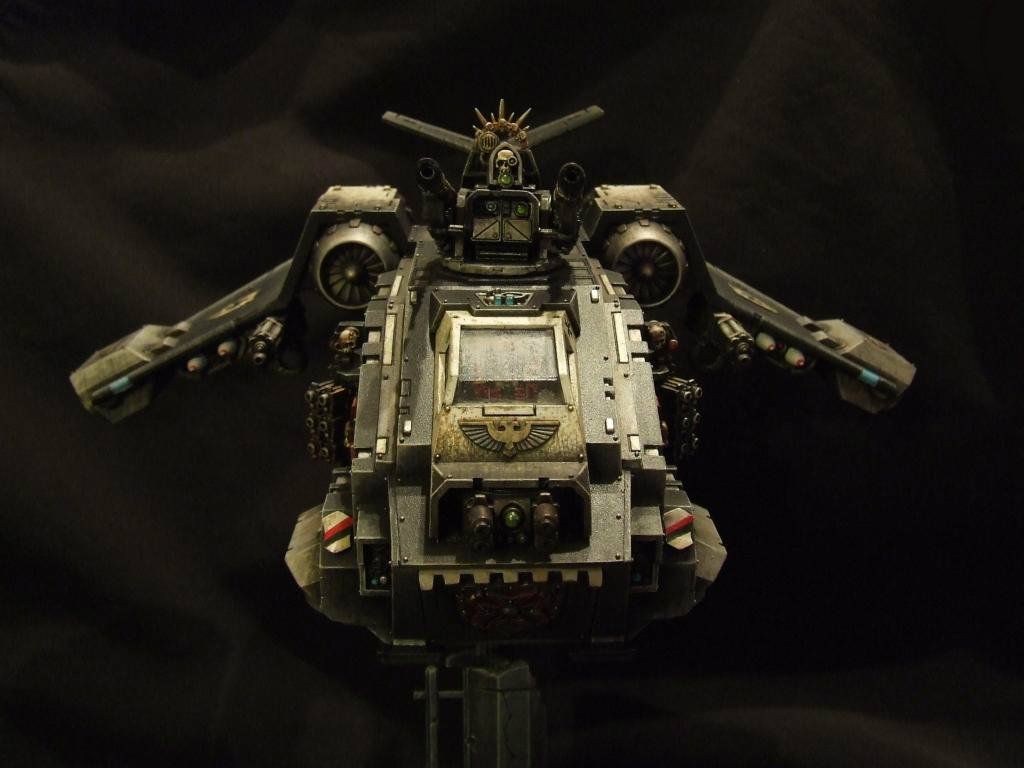
She carrys a hefty payload of ordnance..
I decided to undersling the assault cannons because..
it just looks intimidating I think.
I used heavy bolter magazines behind the barrels
of the cannons to give them a more robust look.
of the cannons to give them a more robust look.
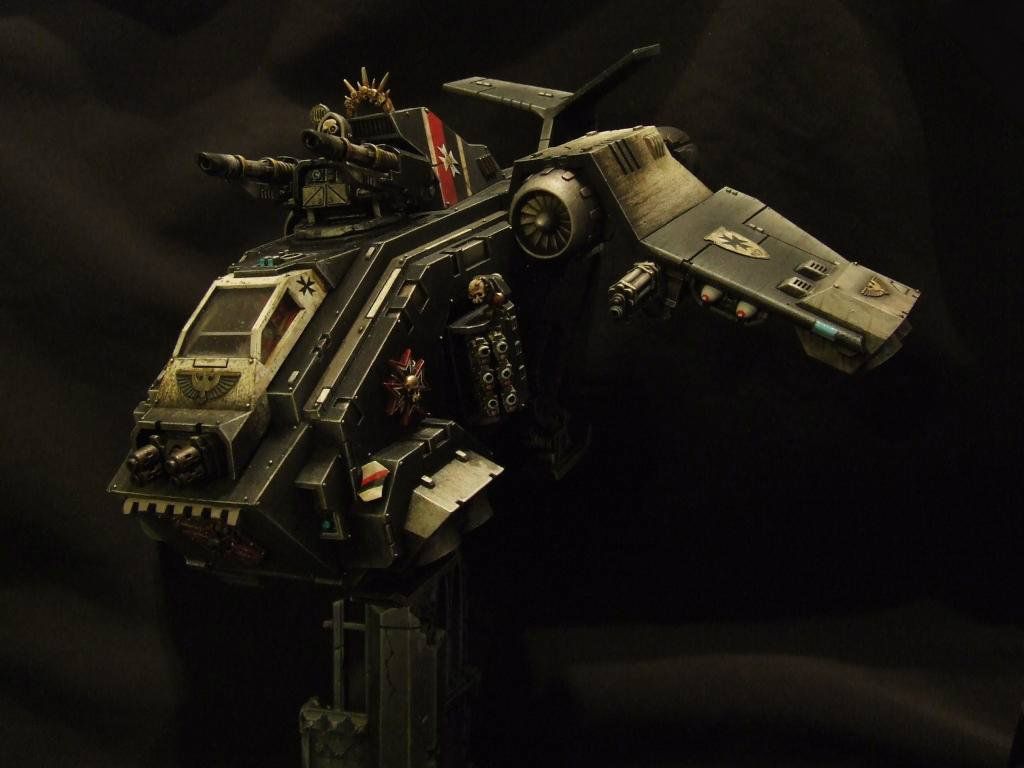
Of course, when things get serious...
a red light comes on in the cockpit to warn the
pilot of incoming missiles and anti air flak.
pilot of incoming missiles and anti air flak.
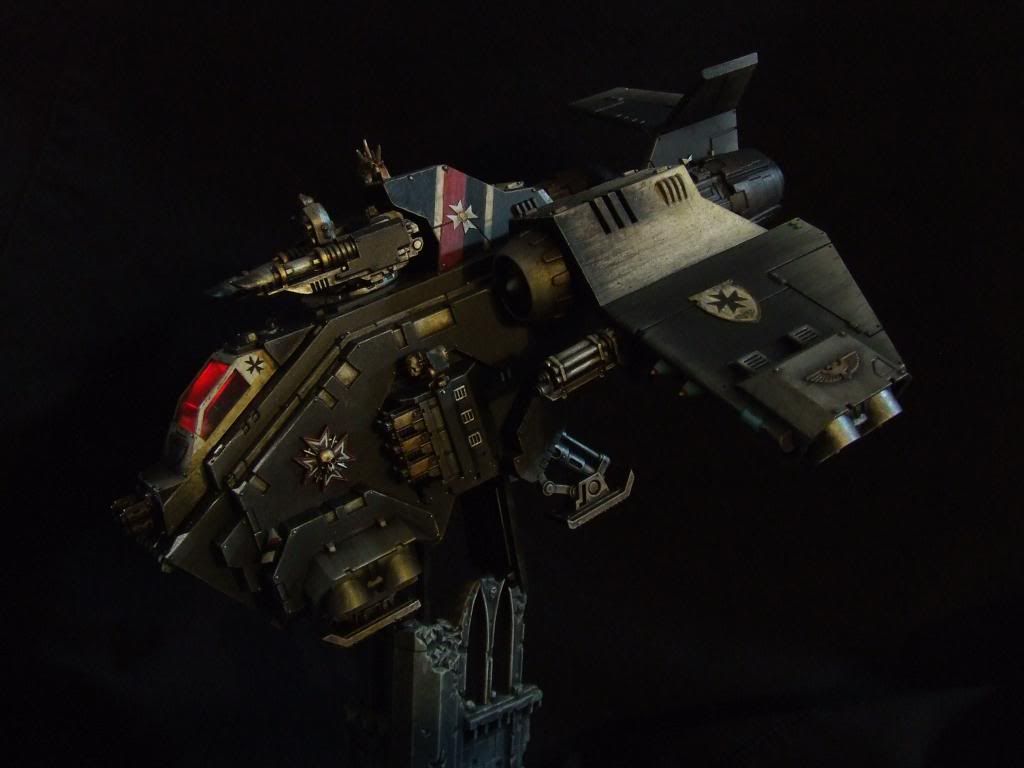
'MAYDAY!!! MAYDAY!!! BLACK TEMPLAR DOWN!!!'
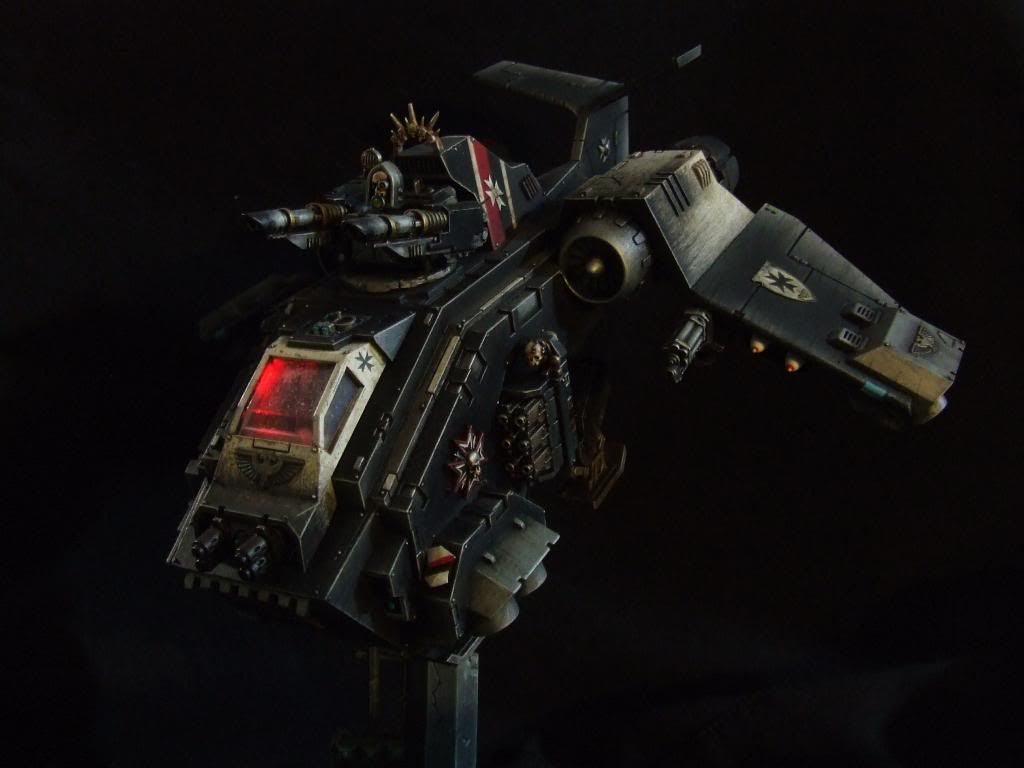
All the doors, sponson weapons and canopy move/open/close/swivel about.
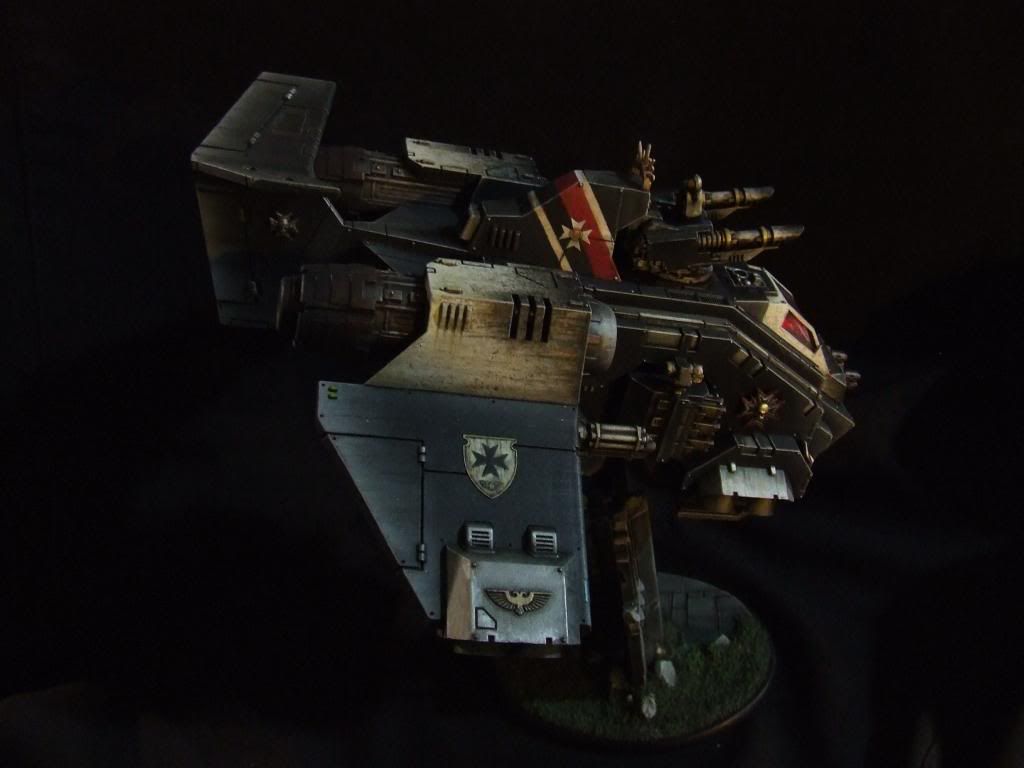
The servo skulls make an appearance on some of the weapon systems.
The one on top is known as 66 or 'Double-Sixer'.
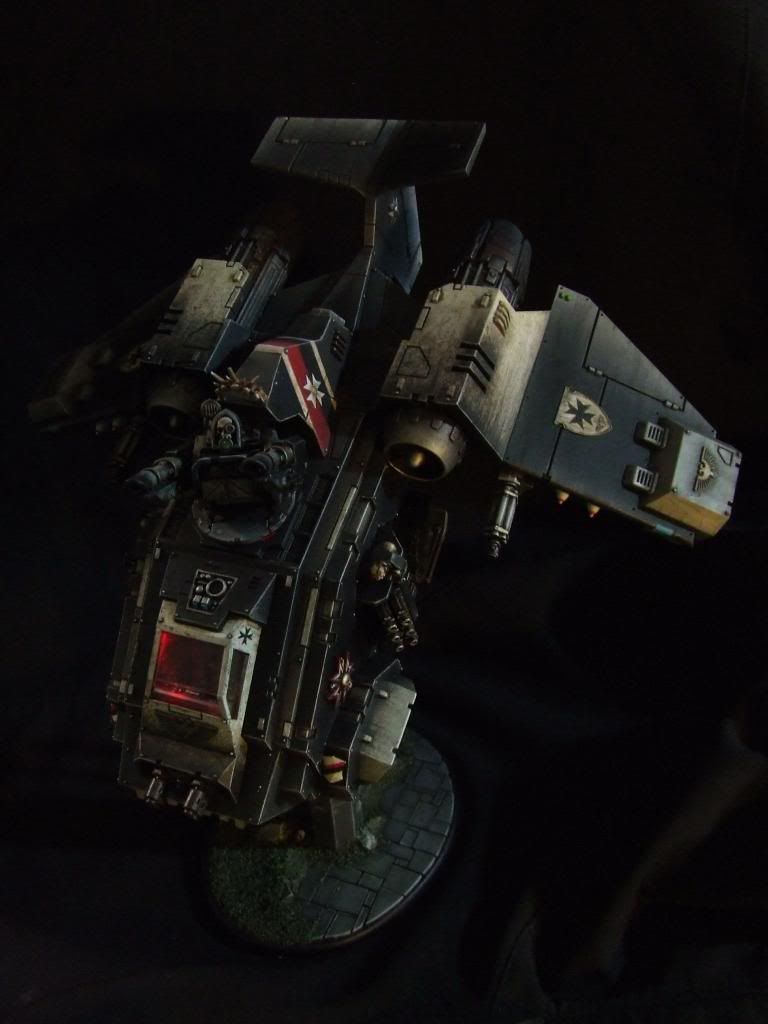
I moved house during the project and lost the original flying stand..
so I made a base out of foamcard, flagstones from plasticard and bits of ruin kit.
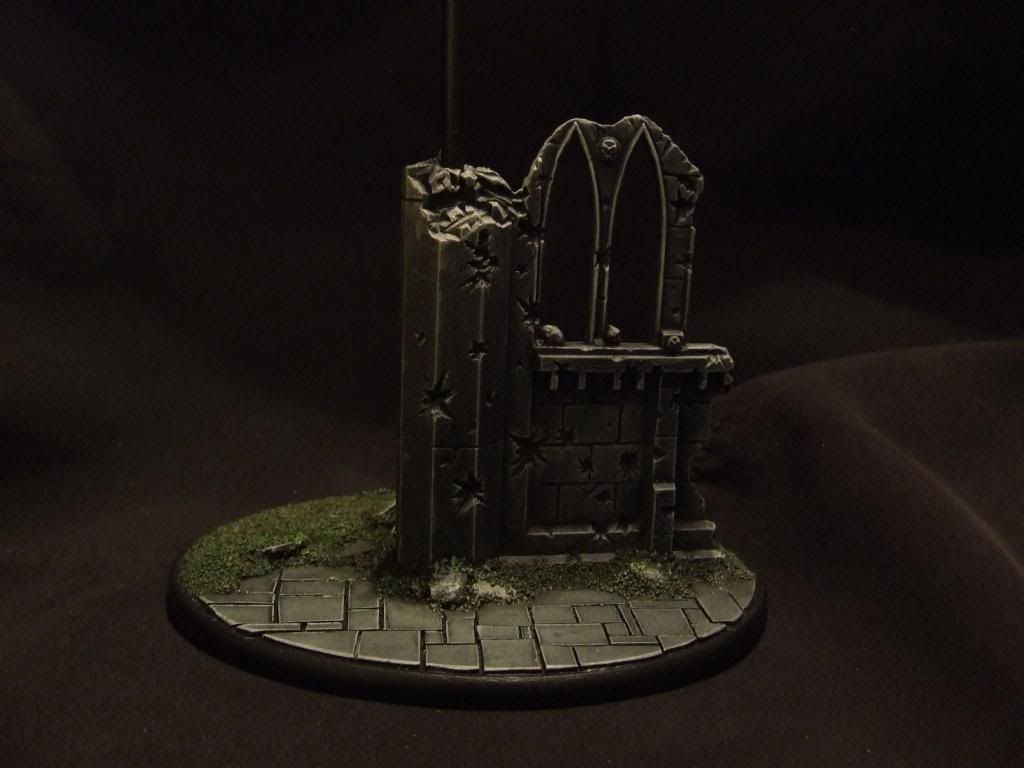
More stuff to come soon!
Wednesday, 12 December 2012
Black Templar Chaplain
Master of Sanctity Ravenstein
in Terminator Armour.
in Terminator Armour.
I picked this guy up for 50p on ebay a few years ago.
It's the old metal casting. He was unpainted but pretty
battered and needed a lot of attention to get him
battle ready once more!
It's the old metal casting. He was unpainted but pretty
battered and needed a lot of attention to get him
battle ready once more!
There's heaps of fantastic details on this miniature to work on.
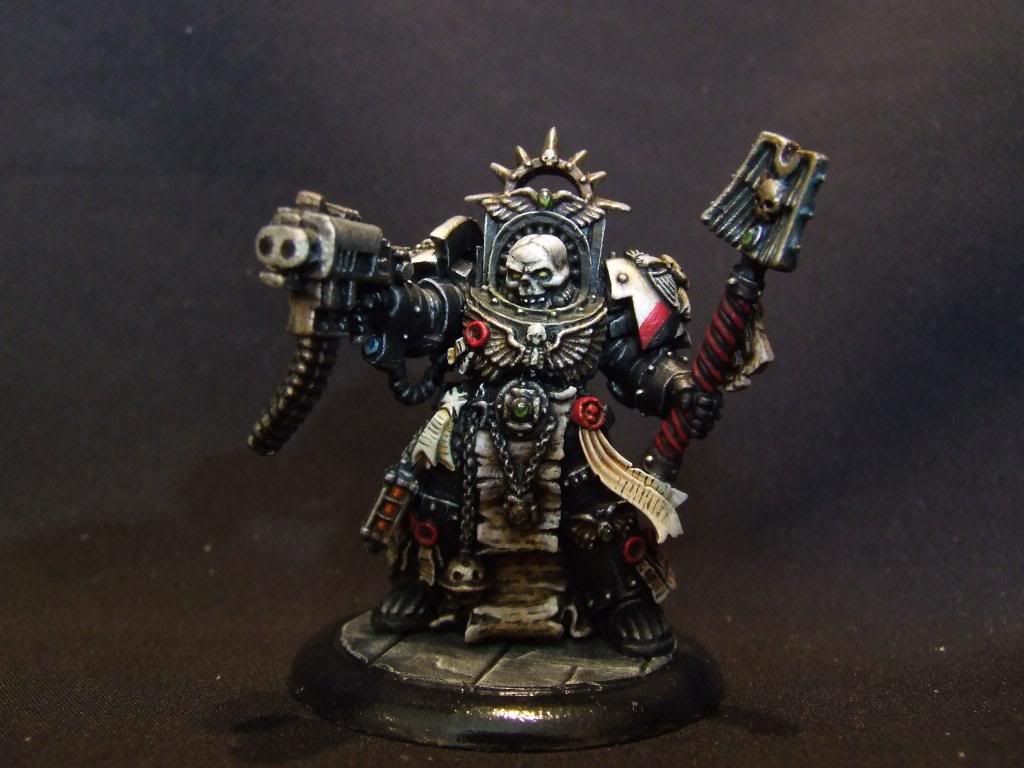
Again, the crusade chevrons are repeated: black and red stripes.
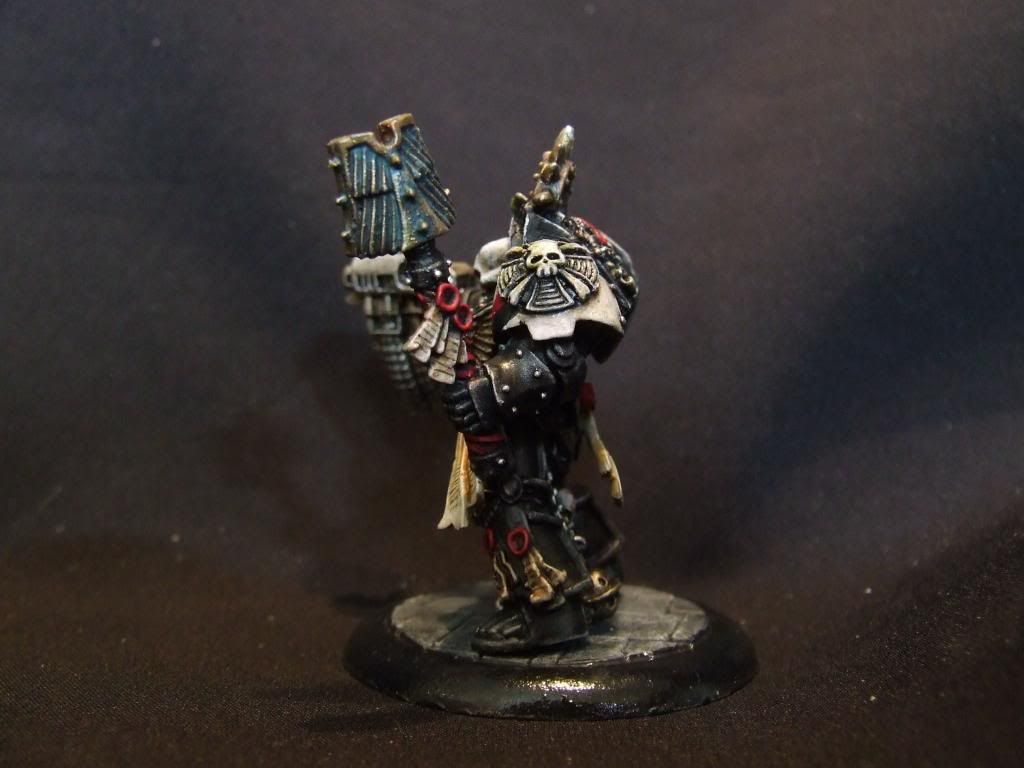
One of those sculpts that is a joy to paint!
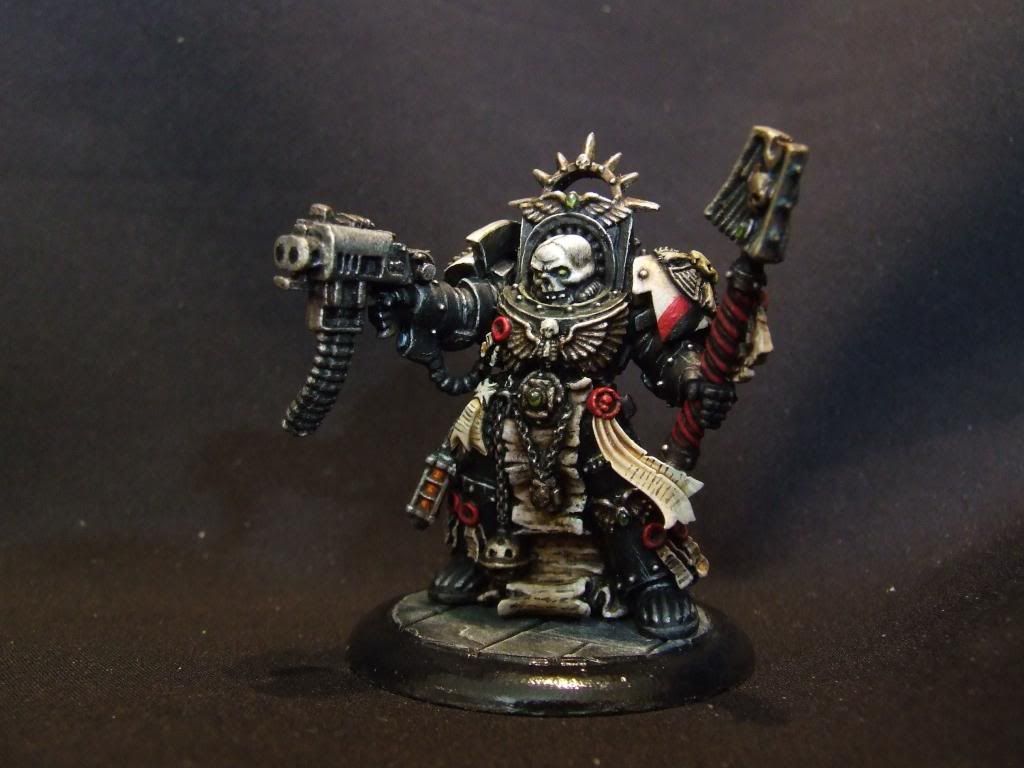
I added a few little extras but nothing crazy.
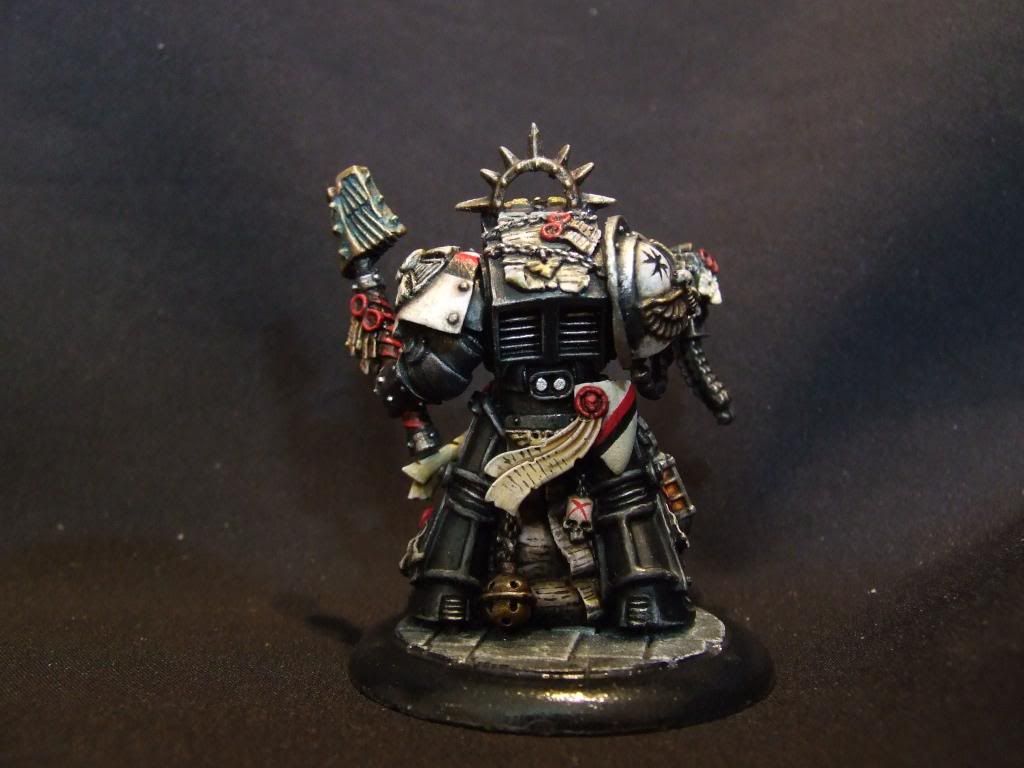
He's all about function.
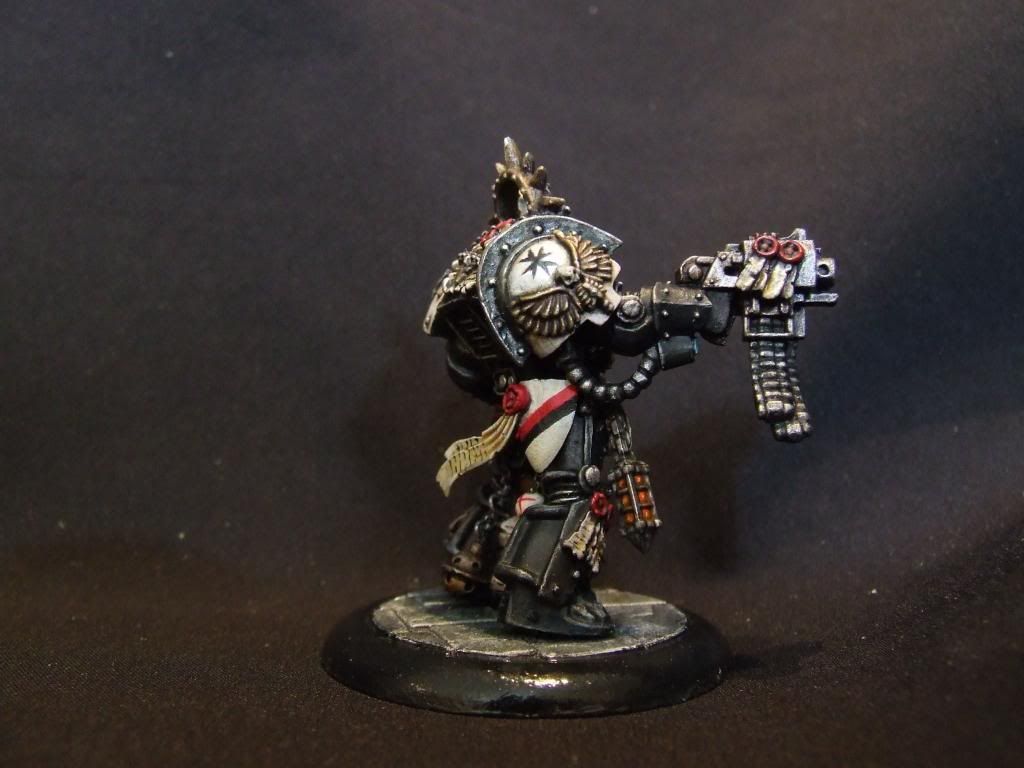
Find heretic.
Purge heretic.
Rinse crozius.
Repeat.
More heroes of the Mercadian Crusade to follow soon!
Subscribe to:
Posts (Atom)